You might think sound deadening products would dampen your audio system. They do the opposite. Sound deadening material reduces the rattling in body panels, door skins, trunk lids, and license plates that your ear cannot separate from the music. Eliminating those uncontrolled vibrations lets you hear your system as it was meant to sound, and for SPL competitors, keeps sound pressure inside the cabin where it can be measured.
How It Works
Vibrations generated by speakers travel through the air as sound. High-performance speakers and subwoofers control those vibrations to produce accurate, high-quality audio. The problem is that body panels, door skins, and trunk lids vibrate too. Those uncontrolled vibrations reach your ears mixed in with the music, reducing perceived sound quality. Sound deadening mat absorbs those vibrations before they become noise.
The most common form is adhesive-backed mat. It is a flexible, rubber-like material with industrial-strength adhesive on one side that bonds to metal surfaces. It contours to curves and irregular shapes and is available in various thicknesses — thicker material provides more deadening but also more weight.
Types of Sound Deadening Kits
Pre-cut sheets sized for door panels. Includes pieces for the inner door skin and exterior door skin, sized to fit through door access holes.
Larger sheets for trunk lids, trunk floors, rear deck undersides, and rear quarter panels. Includes multiple sizes for different surfaces.
Sized specifically for the area around the speaker mounting hole in the door, where vibration is most concentrated.
Available in 1.5mm and 3.0mm thickness for larger applications including floors, roofs, and full vehicle coverage.
Installing on Door Panels

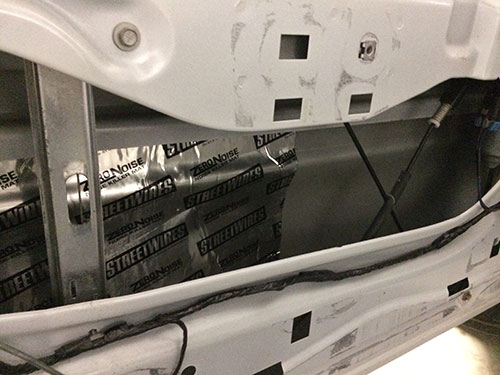
Remove the door panel and any plastic moisture barrier to expose the inner door metal. Keep the plastic barrier — you will reinstall it after the mat is applied. Pass the mat through the largest hole in the interior door frame and apply it to the inside of the exterior door skin.
Use a roller — available at any hardware store — to work the mat from the middle outward, eliminating air bubbles and ensuring full contact with the metal surface. You may need to cut sheets down to a size that fits through the door access holes. Cover as much of the interior door skin as possible while avoiding any moving parts of the window mechanism.
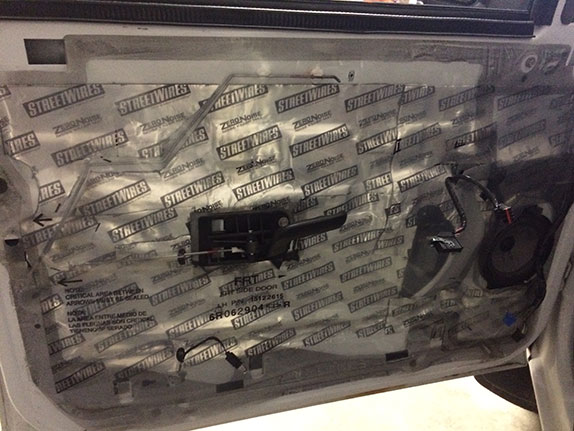
Once the inner door skin is covered, apply mat to the exterior door skin — only in areas that will be covered by the door panel when reinstalled. The mat will flex to most contours, but sharp angles may require a cut or two to lay flat.
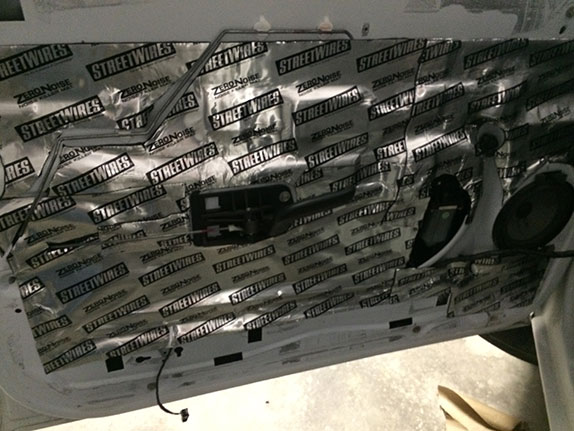
Make cuts in the mat for wire harnesses, linkages, and any other components that need to reconnect to the door panel. Reinstall the vapor barrier and door panel when complete.
Installing in the Trunk
For trunk installations, apply mat to the inside of the trunk lid, the trunk floor, the underside of the rear deck, and the inside of the rear quarter body panels. Some installers also apply mat to the spare tire well under the trunk floor for maximum coverage.
Installing on Floors and Roofs
For floor installations, remove the seats and carpet to access the bare metal floor. Follow the same process as door installation. Cut the mat around all seat mounting points, center console anchor points, and any other hardware that needs to remain accessible. Bulk sheets are best for large coverage areas like floors and roofs.
Beyond Car Audio
Sound deadening mat has useful applications outside the vehicle. Common uses include dishwashers and clothes dryers to reduce operational noise, engine bays on inboard boats, generator compartments on RVs to insulate sleeping areas, inside walls of home theater rooms, and on semi truck sleeper cab interiors for thermal and acoustic insulation.
Sound deadening mat also has thermal insulation value. Applied to a vehicle roof it reduces radiant heat in summer. Applied near catalytic converters or exhaust components it deflects heat away from nearby chassis components and interior surfaces.
Key Installation Tips
- Apply mat directly to the surface you want to prevent from rattling, or closest to the noise source
- More coverage means more vibration absorption — the more panels you treat, the quieter the interior becomes
- Use a roller to ensure full contact and eliminate air bubbles
- Always keep mounting locations clear — cut around tabs, bolt threads, and anchor points before applying
- For doors, remove the plastic vapor barrier before applying mat and reinstall it afterward
- License plates: apply mat directly to the back of the plate and to the mounting surface on the vehicle